Mapping Guide
1.Open all doors, remove obstacles from the floor, and ensure sufficient lighting to allow the map to cover the entire home environment.
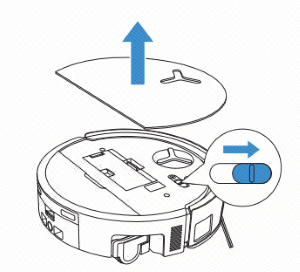
2.Lift the upper cover of the robot, toggle the power switch to "I" , and place it directly in front of the charging dock.
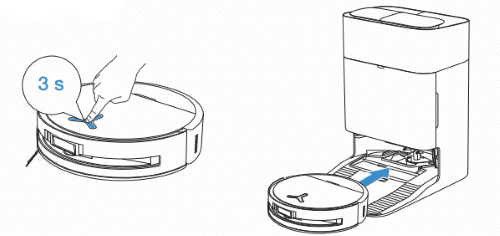
Press and hold the robot's "Auto" button to initiate automatic return to charging. Once docked successfully, charging will begin.
Note: Ensure your robot is connected to the internet and online.
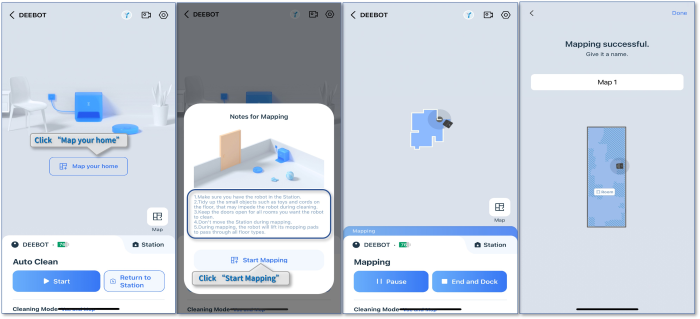
1.Using the App
Open the ECOVACS HOME app > Enter> Mapping.
After mapping is complete, the robot will announce, "Mapping completed. Please check the map in the app." This indicates the map has been created successfully.
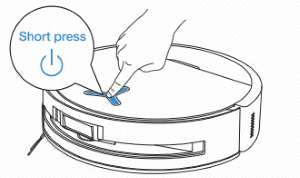
1.You can also press the robot's AUTO button to begin cleaning. The robot will map while working. Upon completion, it will say, "Cleaning finished. Returning to charge," and the map will also be created.
2.After editing the map, manually back up the map to avoid data loss.
Operation videos can be found under 'Tutorial Videos'.